In this tutorial, we will take you through the steps of installing the Git software on a computer running macOS.
Git is one of the most popular version control systems available publicly today. It is most often used within the software development community to track changes made to a codebase. The tracking allows multiple users to collaborate easily on a project.
If you are getting into software development, there is a variety of functionality within Git that you will want to learn. For example, branching and merging are two topics that you will likely want to learn. You will also need to know the basics such as creating or cloning a Git repository.
Below we cover how you can install Git to MacOS using the Homebrew software. Alternatively, we show you how to use xCode to install Git.
We currently do not cover the installer method as that will install a version of Git that is over a year old (As of writing this tutorial).
Installing Git using Homebrew
If you are actively working on software development with your Mac, you will find it beneficial to take the time and install the Homebrew package manager.
1. To install Git using Homebrew, you will first need to install Homebrew.
2. Open the terminal application by going to launchpad and searching “terminal”. Click on Terminal.
3. In the terminal application, enter the following command.
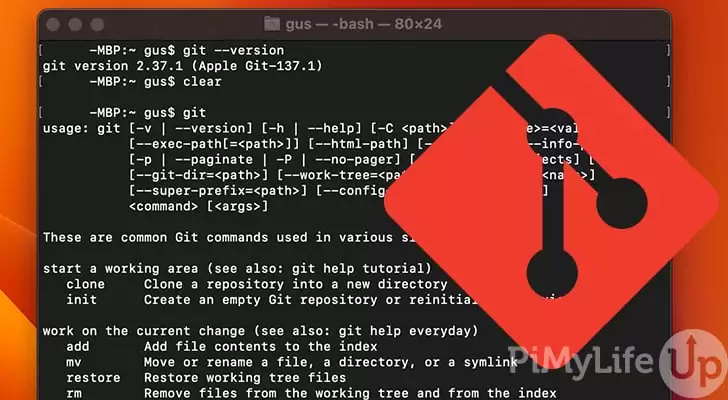
brew install git4. To confirm Git is installed, run the following command.
git --versionInstalling Git using xCode
Git is included within the Xcode software package. If you do not wish to install Xcode, you can install the Xcode CLT (Command Line Tool) instead.
1. The command below will install the Xcode command line tools, which includes the Git software.
xcode-select --install
2. To confirm Git is installed, run the following command.
git --versionBasic Git Configuration
Now that you have installed Git, you will likely want to set up a few basics, such as setting the global username and email address. There are quite a few settings you can alter using git-config, but we will keep it basic for this tutorial.
1. The two lines below will set the global username and email address for our Git Installation. You will want these to match the details of any external Git service you might use, such as GitHub.
git config --global user.name "Gus"
git config --global user.email "example@pimylifeup.com"
2. You can list all the Git config values by typing in the following command.
git config --list3. Below is an example of the output from running the above command. As you can see, it contains our two new config values.
credential.helper=osxkeychain
init.defaultbranch=main
user.name=Gus
user.email=example@pimylifeup.com
4. You may need to perform additional configuration if you wish to connect to an external Git service. For example, you may need to set up SSH keys.
Conclusion
You should now have Git installed on your Mac and usable within the terminal application. If you are having issues, try running through the steps again.
If you are looking for more developer-orientated tutorials for macOS, look at our range of Mac tutorials. We are continually working on more, so let us know if there is a topic you would like us to cover.
If you have run into any issues or have any feedback, please feel free to drop a comment below.