This tutorial will show you how to set up phpMyAdmin on your system using Docker.
phpMyAdmin is a web-based database management tool that is popular for managing MySQL or MariaDB databases.
As a web-based tool, all you need to use it is a supported web browser. You can then open this web interface and manage your databases with most of the tools you would expect.
Docker is a great way to get phpMyAdmin running on your system, as it saves you the haste of setting up your own web server. Additionally, it allows you to quickly run and update to the latest version of this database management tool.
Being able to easily use the latest version of software like phpMyAdmin is critical as security holes could very quickly become quite damaging.
Getting the phpMyAdmin Docker Container Running
Over the following sections, we will walk you through installing the phpMyAdmin Docker container. We will also show you how to install and run the Docker runtime if you haven’t done that yet.
This container is incredibly easy to get up and running, and it is perfect for combining within the same Docker compose file as your MariaDB or MySQL containers.
Installing Docker
1. To run the phpMyAdmin Docker container on your device, you must have the Docker runtime installed. If you already have this installed, skip to step 4 of this tutorial.
Alternatively, installing Docker is as simple as using the following command within the terminal.
curl -sSL https://get.docker.com | sh2. After installing Docker you will want to add your current user to the “docker” group using the usermod command.
By adding your user to this group, you can control your containers without being the superuser.
sudo usermod -aG docker $USER3. Any change to a group on Linux won’t take effect until you log out and back into your user.
You can log out of your current session by using the following command.
logoutAlternatively, you can always restart your machine by running the command below.
sudo rebootPreparing to Run the phpMyAdmin Docker Container
4. Your next step is to create a directory to store the Docker Compose file for phpMyAdmin.
You can create this directory by using the mkdir command. The “-p” option ensures all directories are created within the given path.
sudo mkdir -p /opt/stacks/phpmyadmin5. Once the directory has been created, you can change into it by utilizing the cd command.
cd /opt/stacks/phpmyadminWriting a Docker Compose file for phpMyAdmin
6. Our next step is writing the Docker Compose file for phpMyAdmin. This file contains instructions for Docker to follow when starting up the given containers.
You can begin writing this file with the nano text editor using the command below.
sudo nano compose.yaml7. At its most basic usage, you will want to fill out the file with the following lines.
These lines set up phpMyAdmin and set the environment variable “PMA_ARBITRARY” to 1. By setting this value to 1, you can specify the server the database management tool should connect to.
One thing you might consider replacing while writing this file is the port phpMyAdmin will be exposed. Replace “8080” with a different port if you already have a service set up on it.
version: '3'

services:
  phpmyadmin:
    image: phpmyadmin
    container_name: pma
    ports:
      - 8080:80
    environment:
      - PMA_ARBITRARY=1
When setting up phpMyAdmin using Docker Compose, including it within the same file you used to set up your database server is very common.
Below is a quick example of a Compose file with both services.
version: '3'

services:
  db:
    image: mariadb:latest
    environment:
      MYSQL_ROOT_PASSWORD: examplerootpass
      MYSQL_DATABASE: exampledb
      MYSQL_USER: exampleuser
      MYSQL_PASSWORD: examplepass
    volumes:
      - ./data:/var/lib/mysql
    ports:
      - "3306:3306"
  phpmyadmin:
    image: phpmyadmin/phpmyadmin
    container_name: pma
    ports:
      - 8080:80
    environment:
      - PMA_HOST="db"
      - PMA_ARBITRARY=1
8. Once you are done filling out this file, you can save and quit by pressing CTRL + X, Y, and then ENTER.
Starting up the phpMyAdmin Container
9. With the Compose file written, you can start the phpMyAdmin Docker container by running the following command.
Docker will download the latest version of the phpMyAdmin container and start it. Using the “-d” option, Docker will detach from the current terminal session once it has started.
docker compose up -dAccessing the phpMyAdmin Web Interface
10. To access your new phpMyAdmin Docker container, you will need to know your machine’s IP address.
If you don’t know it, one of the easiest ways to get your machines assigned IPs is to use the hostname command.
hostname -I11. In your favourite web browser, you will want to go to the following address.
Replace “
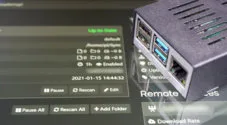
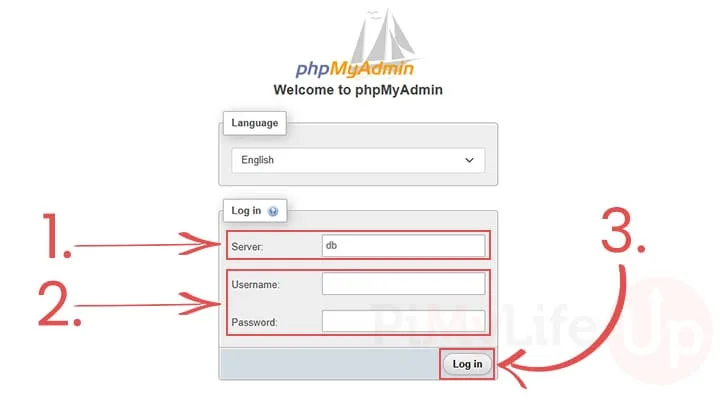
http://:8080 12. When you first access phpMyAdmin. you will need to login to access the database management tool.
- Since we set the “
PMA_ARBITRARY” environment variable, you must type in your database server’s address (1.).If you combine this with your MariaDB or MySQL container, you can simply use the container name here.
- After typing in the address of the server you want to connect to, enter the username and password of a user on your database server (2.).
- With all your details entered, click the “
Log in” button (3.) to continue.
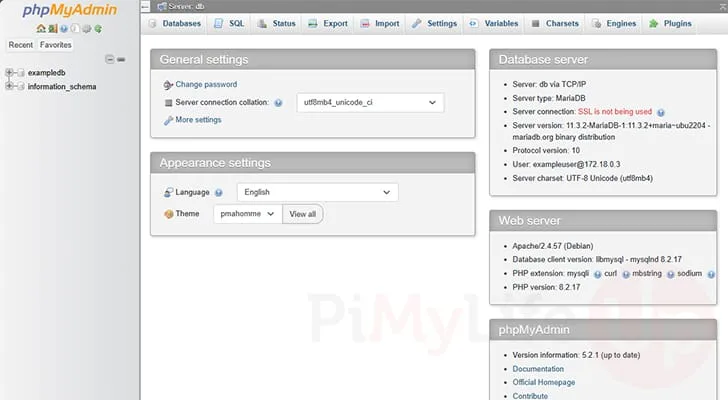
13. Below, you can see that we have successfully connected to the phpMyAdmin web interface.
We can now use this tool to manage your MySQL or MariaDB databases easily.
Updating your phpMyAdmin Docker Container
One huge advantage of using Docker containers is that they allow you to easily update software such as phpMyAdmin to the latest version. While some software can be a little clunky to update normally, Docker makes this a breeze.
This section will show you how to easily upgrade to the latest release of the phpMyAdmin Docker container.
1. Before you update your release of phpMyAdmin you will need to change to the directory where you wrote the Compose file.
If you follow our guide, you should be able to change into the correct directory using the following command.
cd /opt/stacks/phpmyadmin2. Once you are in the right place, you can get Docker to download the latest version of phpMyAdmin by using the command below.
Docker will scan the Compose file and check whether there is a new image to download for each available service.
docker compose pull3. With the new versions downloaded, you will want to move over your existing containers to it.
Luckily, Docker Compose makes this process as easy as running the command below. It will automatically detect which containers have a new version and move them over to it.
docker compose up -dConclusion
At this stage in the tutorial, you will hopefully have the phpMyAdmin Docker container up and running on your device.
Docker is a fantastic way to get this database management tool up and running. It makes it easy to ensure you are running the latest version.
Please leave a comment below if you have any issues getting this container running.
If you found this tutorial to be helpful, we recommend checking out our many other Docker tutorials.