Last month the Raspberry Pi team took a trip out to San Jose in California to attend SiliCon with Adam Savage, and I gave a talk. Well, more of a demo. In any case, I talked about how to get started with Raspberry Pi Pico and Pico W, going from zero to playing Doom on a microcontroller, all inside of an hour. If you didn’t manage to make it out to San Jose, this is what I talked about.

This is the Raspberry Pi Pico. This is what we’re going to be playing with today. It is a $4 microcontroller board.

So the difference between this, and a “normal” Raspberry Pi, or your laptop or desktop, is that the Raspberry Pi or your laptop are computers, and run an operating system. While a Raspberry Pi has a GPIO (that’s general purpose input output) header to allow you to connect physical hardware to it, the operating stands between the things you connect and the processor.
That makes it hard to do “real time” things, because the operating system is always doing other things, like drawing your mouse pointer moving across the screen, or your 137 open browser tabs (no judgement there) distract it from reading from your sensors or moving your actuators.
The Raspberry Pi Pico is a “microcontroller class device”, not a computer. It doesn’t run an operating system — well, generally, it can, but it mostly doesn’t. Mostly we talk to the hardware directly.
There are actually three models of Raspberry Pi Pico.

Leftmost is the original one, designed with castellated headers so that it can be soldered down onto your own PCB.
If you’re breadboarding and want to avoid having to do some soldering, there’s the Pico H. It comes with headers pre-attached.
Finally, there is the Pico W. It’s a Raspberry Pi Pico with 802.11n wireless networking. All three are rather cheap. Later this year you’ll probably see the arrival of the Pico WH, and my guess is you can work out what that is yourselves.
Raspberry Pi Pico is our first microcontroller-class product, and is built around own Raspberry Silicon. The RP2040, developed in-house at Raspberry Pi in Cambridge, UK, is a Dual-core Cortex M0+ running at 133MHz.
It’s our idea of the perfect mid-range microcontroller, based on years of using other vendors’ devices in our own products and projects.

The RP2040 is designed for flexible input-output. There are 30 general purpose I/O — GPIO — pins, and Pico exposes 28 of these for you to play with. We provide all the usual interfaces: two hardware UARTs, two SPI and I2C controllers, 16 PWM channels, along with USB 1.1 support (both client and host mode), and a four-channel ADC.
But the unique feature is programmable I/O (PIO). It is the PIO subsystem that makes RP2040 stand out. PIO enables software implementations of protocols such as SDIO, DPI, I2S, and even DVI without having to resort to bit banging the implementation, and without affecting — or even using — either of the two main cores on chip.

Traditionally, programming microcontroller products like Raspberry Pi Pico has been done from C, C++, or even assembler; the received wisdom is that the more low-level the language you use, the more powerful your project will be.
Those days are not exactly past, and if you need to get the most out of the hardware you should still drop down to C. We have a fully supported C and C++ SDK for RP2040 and Pico. However, if you don’t quite need to squeeze every cycle out of the board — and let’s face it: most people, building most projects, don’t — there are now alternatives.
One of these is the officially supported port of MicroPython to RP2040 and Pico.
MicroPython is a lean and efficient implementation of the Python 3 programming language that includes a small subset of the Python standard library and is optimised to run on microcontrollers and in constrained environments. The RP2040 port exposes all of the chip’s hardware features, including our unique PIO subsystem; and there is full support for development inside the Thonny IDE.
You can download the MicroPython firmware for both Pico and Pico W from the MicroPython site.
The firmware comes as a UF2 file which can just be dragged-and-dropped from your main computer’s desktop onto the board, which will mount as a drive when you plug it into your laptop or desktop.
Just push and hold the BOOTSELECT button, and plug the board into your laptop.
It’ll mount as an external drive on your desktop called RPI-RP2, and you can then just drag-and-drop the UF2 firmware onto the drive.
This will copy the firmware from your laptop onto the microcontroller, and it’ll start running just as soon as it finishes copying. On most computers, this will cause a “Disk Not Ejected Properly” error, but you can safely ignore that. MicroPython is now installed and running, on the Raspberry Pi Pico.
Today I’m going to be using the Thonny editor.

While Thonny is beginner-friendly, you can flip it into “expert” mode, and it’s actually a pretty powerful editor. But the main advantage of it is that it can talk directly to the Python runtime running on your Raspberry Pi Pico, and will open up the Python REPL which is exposed as a serial-over-USB console.
The REPL, or the read-evaluate-print-loop, allows you to run individual lines of code, one at a time.
You can write and run multiple lines of code in sequence to execute a longer program, and it’s great for testing a program line by line to determine where an issue might be. It’s interactive, so it’s excellent for testing new ideas. But it’s important to remember that the REPL is ephemeral: any code you write there is not saved anywhere.

The Pico board has an onboard LED and we can access that from Python. It’s actually pretty easy to turn on: we just import the machine library, point it at the pin of the RP2040 that the onboard LED is connected to, and turn it on, and back off. We can even toggle it in a single line of code, all from the Python REPL.
>>> import machine
>>> led = machine.Pin("LED", machine.Pin.OUT)
>>> led.on()
>>>
>>> led.off()
>>> led.toggle()
We can also blink our onboard LED on and then back off again automatically.
import time
import machine
led = machine.Pin("LED", machine.Pin.OUT)
while True:
led.on()
time.sleep(1)
led.off()
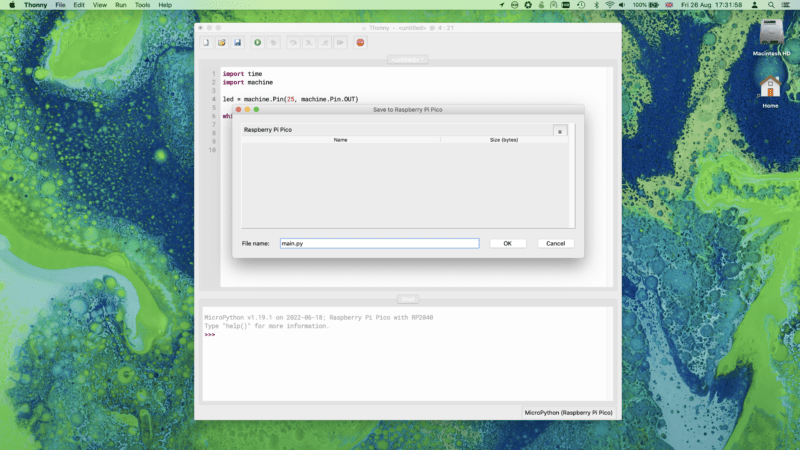
time.sleep(1)If we want to save code to the board — so that when you unplug the board and plug it back in again it’ll start running your code again — we’ll save our code to a file called main.py file on the board itself.
Just by changing a single line of code, we can switch from using the onboard LED to using an external LED:

import time
import machine

led = machine.Pin(16, machine.Pin.OUT)

while True:
    led.on()
    time.sleep(1)
    led.off()
    time.sleep(1)
and then we can go further we can add a button.

Then by adding a couple of lines of code we can print the “value” of the button — a 1 for pressed down, and a 0 for released — every time we blink the LED on and then off again.
import time
import machine

led = machine.Pin(16, machine.Pin.OUT)
button = machine.Pin(15, machine.Pin.IN, machine.Pin.PULL_DOWN)

while True:
    led.on()
    print(button.value())
    time.sleep(1)
    led.off()
    time.sleep(1)
However, what we really want to do is control our LED using the button. The code below will turn the LED on when the button is pushed, and then back off when it is released. This is known as a “momentary contact” switch.
import time
import machine

led = machine.Pin(16, machine.Pin.OUT)
button = machine.Pin(15, machine.Pin.IN, machine.Pin.PULL_DOWN)

while True:
    if button.value():
        led.on()
    led.off()
Going a bit further, we can use the button to toggle the LED on, and then off again. Push the button and the LED turns on, push the button again and you turn it off.
import time
import machine

buttonState = False
lastButtonState = False
buttonCounter = 0

led = machine.Pin(16, machine.Pin.OUT)
button = machine.Pin(15, machine.Pin.IN, machine.Pin.PULL_DOWN)

while True:
    buttonState = button.value()
    if buttonState != lastButtonState:
        if buttonState:
            buttonCounter += 1
            led.toggle()
            print("button pushes ", buttonCounter)
        time.sleep(0.2)
    lastButtonState = buttonState
Next up we can play with a temperature and humidity sensor. The DHT sensors are low-cost digital sensors with capacitive humidity sensors and thermistors to measure the surrounding air. They feature a chip that handles analogue to digital conversion and provide a 1-wire interface. Newer sensors additionally provide an I2C interface.

The DHT11 (blue) and DHT22 (white) sensors provide the same 1-wire interface. However, the DHT22 has one decimal place resolution for both humidity and temperature readings, while the DHT11 has a whole number for both.
>>> import machine
>>> import dht
>>> pin = machine.Pin(15, machine.Pin.IN)
>>> sensor = dht.DHT22(pin)
>>> sensor.measure()
>>> sensor.temperature()
24.4
>>> sensor.humidity()
48.5
>>>
A custom 1-wire protocol, which is different to the standard Dallas 1-wire, is used to get the measurements from the sensor. The payload consists of a humidity value, a temperature value and a checksum.
Finally, after playing with sensors, let’s go back to LEDs, and look at how to use Neopixels — those super clever, chainable, addressable, full-colour RGB LEDs.

Here we can flood the Neopixel array with colour:
import machine
from neopixel import NeoPixel

num_pixels = 24
color = (0, 100, 0)
strip_pin = machine.Pin(15, machine.Pin.OUT)

strip = NeoPixel(strip_pin, num_pixels)

strip.fill(color)
strip.write()
and then change things out so that we chase the LED.
import machine

from neopixel import NeoPixel
from time import sleep

num_pixels = 24
color = (0,100,0)

strip_pin = machine.Pin(15, machine.Pin.OUT)

strip = NeoPixel(strip_pin, num_pixels)

while True:
    for i in range(0, num_pixels):
        strip.fill((0,0,0))
        strip[i] = color
        strip.write()
        sleep(0.1)
Finally, we can jump ahead and do something a bit more complicated, and chase the rainbow!
from machine import Pin
from neopixel import NeoPixel
from time import sleep

num_pixels = 24
colour = (100,0,0)

strip_pin = Pin(15, Pin.OUT)
pixels = NeoPixel(strip_pin, num_pixels)

def wheel(pos):
    if pos  255:
        r = g = b = 0
    elif pos
But of course, we have to ask ourselves, “…can it play DOOM?”
The answer? Yes, it can.


