Fedora often introduces numerous enhancements, bug fixes, security updates, and new features. Therefore, it is essential to keep all software up-to-date. Fedora supports package managers such as RPM (DNF), Flatpak, and OSTree – GNOME Software is the default graphical front-end.
This guide demonstrates how to update Fedora to obtain the most recent software. There are two ways to update Fedora: the graphical user interface and the command line.
Regardless of the distribution, it is essential to maintain all packages up-to-date. Updates to packages include numerous enhancements, bug fixes, security patches, and new or enhanced functionality.
Updating Fedora
Fedora is a Linux distribution based on RPM maintained by the Fedora Project. Fedora serves as the testing ground for future Red Hat Enterprise Linux versions. Fedora is open-source software, but RHEL is not. However, their bases are identical.
Fedora is suited for all applications. It is suitable for general usage, server, workstation, and other applications.
There are two ways to update Fedora based on the UI: GUI and CLI.
(Graphical User Interface) GUI-based Fedora update
Fedora ships with the GNOME desktop by default. A significant characteristic of the GNOME desktop is that it includes various potent tools. This procedure illustrates how to update Fedora using the GNOME Software application.
Launch GNOME Applications. It is a graphical user interface for package and repository administration.
Select the Updates tab. If an update is available for any package, it will be displayed here. To recheck for available updates, click the symbol in the upper-left corner labeled “Refresh.”
To install updates, select “Download” from the menu. The operation requires root privileges.
That’s it! All packages have been updated!
Update Fedora with the CLI
Fedora is easy to maintain and update with the included package managers. Fedora is compatible with both the DNF and YUM package managers. However, DNF is advised because it is an improvement over the usual YUM.
1. Using YUM, update Fedora
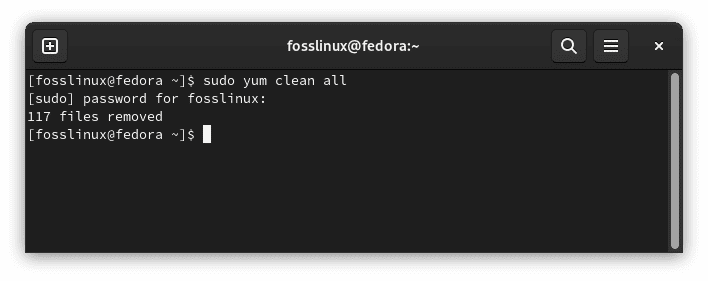
Start up the terminal. This initial step is optional. However, it may assist in resolving specific package update-related issues. Remove the local YUM repository cache by executing the command below:
sudo yum clean all
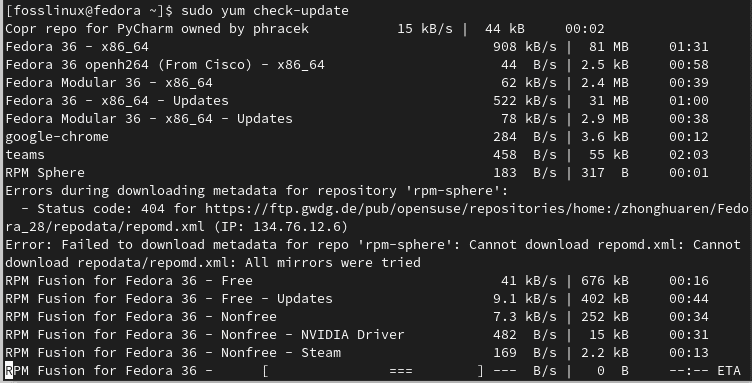
The command below will check for any available updates. If the cache were previously cleared, it would reload the cache.
sudo yum check-update
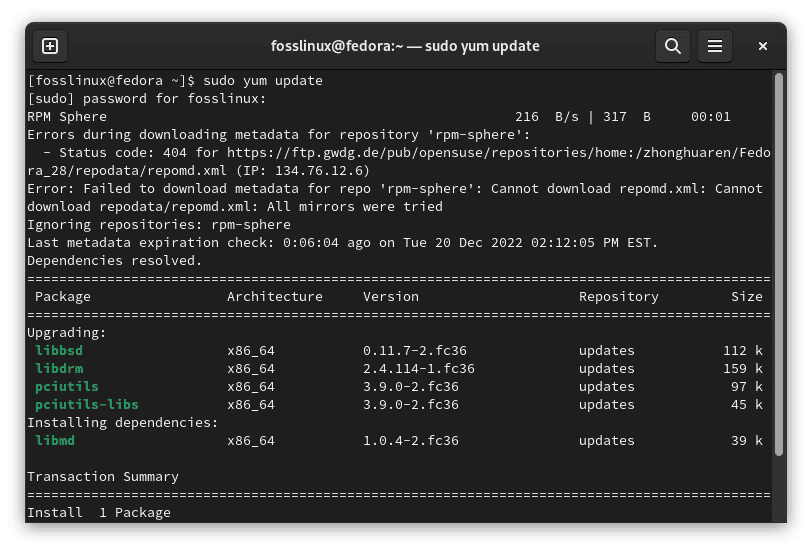
If any updates are available, use the command below to install them all.
sudo yum update
Use the alternative command structure below to update only the chosen package(s).
sudo yum update
2. Using DNF, update Fedora
DNF is the default package manager included with Fedora. It provides a nearly identical user experience while addressing several YUM’s issues (memory inefficiency, slower speed, etc.).
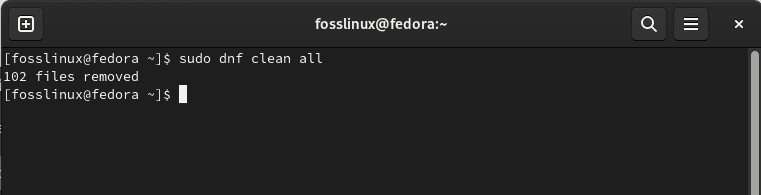
Using DNF to update is comparable to using YUM. Initiate a terminal session and clear the DNF cache. Despite being an optional task, it is imperative.
sudo dnf clean all
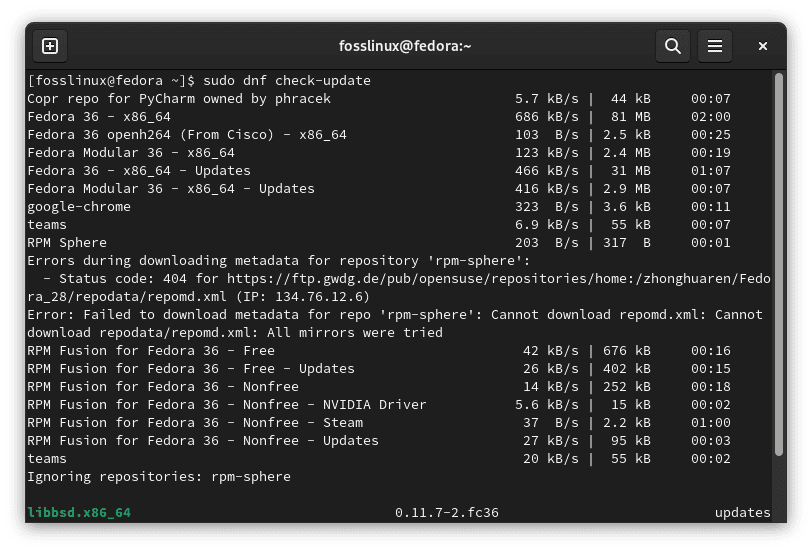
Determine if an update is available. If the cache has been cleared, DNF will automatically recreate it.
sudo dnf check-update
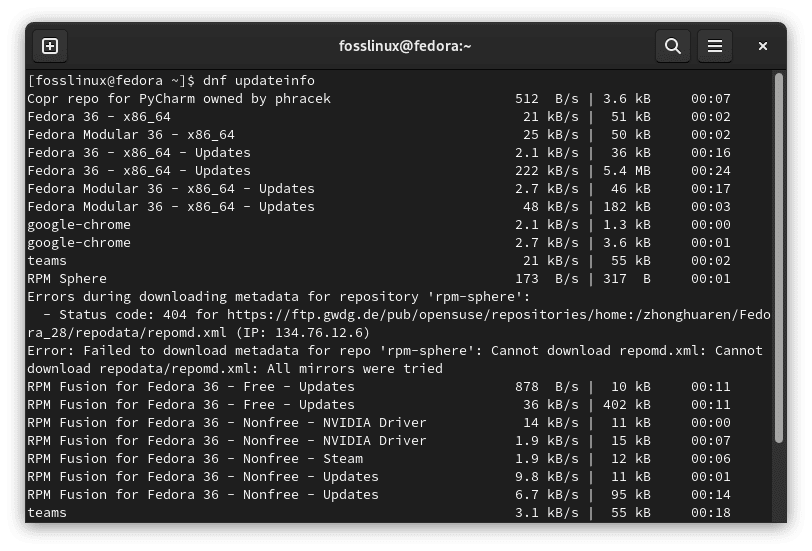
To get an overview of available updates, enter
dnf updateinfo
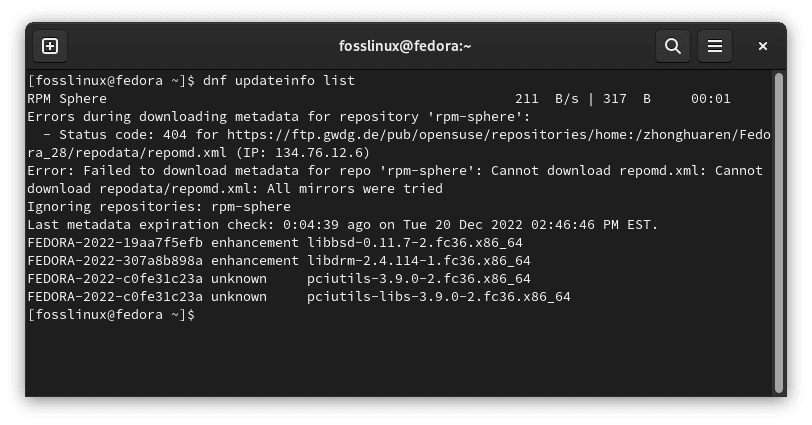
To list updates and the categories to which they belong:
dnf updateinfo list
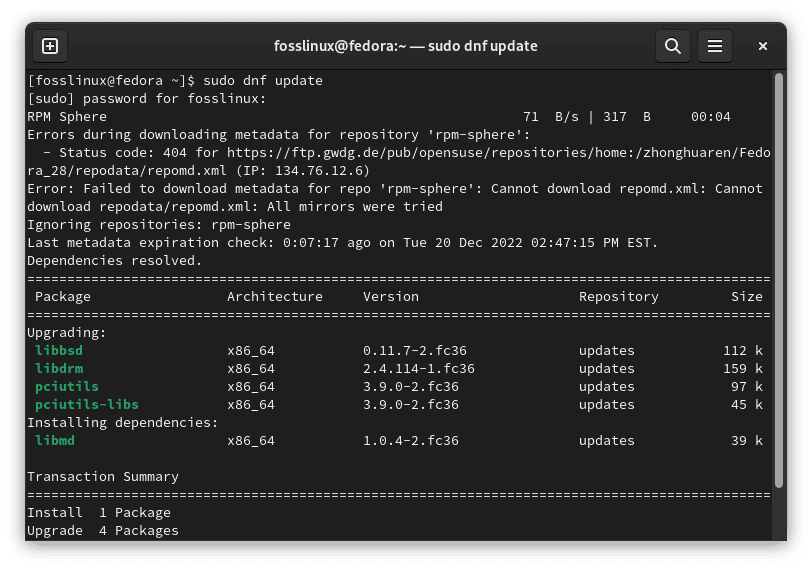
If there are any accessible package updates, the following DNF command will install them all.
sudo dnf update
Use the alternative command structure below to update particular packages.
sudo dnf update
Upgrading Fedora
When a new version of Fedora becomes available, installing it without reinstalling the entire operating system is feasible. This process may take a considerable amount of time. Always back up your vital data, especially those stored in system folders.
Ready? Let’s get started! We will use the DNF package manager to complete the task. First, verify that all presently installed packages are updated.
sudo dnf upgrade --refresh

Note: Do not miss this procedure. System updates are essential to get signing keys for higher-versioned releases, and they frequently resolve upgrade-related issues.
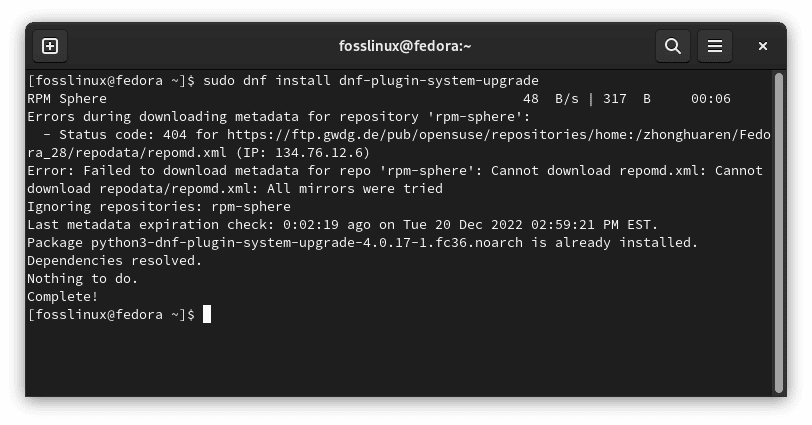
DNF requires a system upgrade plugin for system upgrades. Install the DNF system upgrade plugin.
sudo dnf install dnf-plugin-system-upgrade
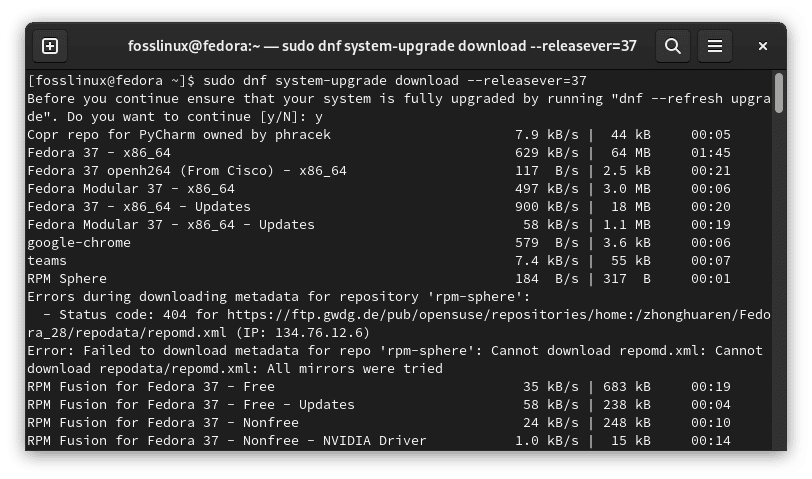
The following step involves downloading the system upgrade. Verify the Fedora system version to which you are upgrading. For example, we shall be downloading Fedora 37 in this guide. To do so, execute the following command:
sudo dnf system-upgrade download --releasever=37
Note: If you wish to update to a different release, modify the –releasever= parameter. Most users will want to update to Fedora 37, the newest stable release. However, in rare situations, such as if you’re using a release older than 36, you may wish to upgrade to Fedora 36. System upgrading is only supported and tested for a maximum of two versions (e.g., from 35 to 37). If you need to update across many versions, it is advised to do so in stages.
Additionally, 38 may be used to upgrade to a Branched release, while rawhide can upgrade to Rawhide. Note that neither of these releases is stable. For information regarding the upgrading procedure and frequent difficulties associated with these two releases, please refer to the relevant sections on Fedora’s official website
If any packages have unmet dependencies, the upgrade will halt until you rerun it with the –allowerasing option. This typically occurs with programs installed from third-party repositories for which new repositories have not yet been released. Sift through the report to determine which packages will be deleted. None of these should be required for system operation, but some may be crucial to your efficiency.
When importing a new GPG key, you are prompted to validate the key’s fingerprint. Refer to https://getfedora.org/security to do so. In cases with unfulfilled dependencies, the –best command-line option might provide further information.
If you want to remove/install packages manually before rerunning the dnf system-upgrade download, you should use the –setopt=keepcache=1 dnf command line option. Otherwise, the whole package cache will be erased after your action, requiring you to re-download all programs.
Start the upgrading procedure. It will reboot your system into the update process running in a console terminal (immediately! without a countdown or confirmation, so shut other programs and save your work), then execute this line of code:
sudo dnf system-upgrade reboot
After the upgrade, your machine will reboot into the latest Fedora release version.
Optional must-do post-upgrade tasks
These are some tasks that may be performed following a successful update.
1. Update system configuration files
The majority of configuration files are kept in the /etc directory. If the package’s configuration files have been modified, RPM produces new files with either.rpmnew (the new default configuration file) or.rpmsave (your old config file backed up). You can search for these files or use the rpmconf tool to simplify the procedure. Install rpmconf by executing the following command:
sudo dnf install rpmconf
Once the installation is finished, run the following:
sudo rpmconf -a
2. How to update the GRUB bootloader on BIOS-supported systems
The GRUB RPM packages have been changed on systems with BIOS firmware. But the bootloader that is installed or built-in is never automatically updated. Between Fedora releases, it is a good idea to update it.
Determine which device node the /boot/ directory resides on by using the following code:
sudo mount | grep "/boot"

/dev/sda4 on /boot type ext4 (rw,relatime,seclabel)
The node for the device is /dev/sda4. Reinstall the bootloader with the device node specified without a number:
sudo grub2-install /dev/sda
3. Purge retired packages
Fedora retires a handful of packages with every release. There are numerous reasons for this, including obsolete packages, dead upstream, or the maintainer resigning. Fedora no longer distributes these packages, but they remain on your system. These packages are not eligible for upgrades. It is advised that they be eliminated.
If you are upgrading between releases (such as from Fedora 36 to 37), execute the following commands:
sudo dnf install remove-retired-packages

remove-retired-packages
If you are upgrading between two releases (for example, from Fedora 35 to 37), you must provide the old release version to remove-retired-packages:
sudo dnf install remove-retired-packages

remove-retired-packages 35
Note: It is not possible to upgrade between more than two releases.
4. Get rid of old kernels
After you have tested the system with the latest kernel and booted into it, you can eliminate the older kernels. Even after dnf autoremove, old kernels stay, so they don’t get removed by accident.
A script that keeps the most recent kernel is one of the easier ways to get rid of old kernels. The script below works whenever Fedora updates a kernel and does not depend on a system upgrade.
#!/usr/bin/env bash

old_kernels=($(dnf repoquery --installonly --latest-limit=-1 -q))

if [ "${#old_kernels[@]}" -eq 0 ]; then

echo "No old kernels found"

exit 0

fi

if ! dnf remove "${old_kernels[@]}"; then

echo "Failed to remove old kernels"

exit 1

fi

echo "Removed old kernels"

exit 0
5. Get rid of old packages.
If you type the command below, you can see a list of packages whose dependencies are broken.
sudo dnf repoquery –unsatisfied
The list should be empty, but if it isn’t, you might want to take them off because they probably won’t work. You can see duplicate packages, which are packages that have more than one version installed when you type the command below:
sudo dnf repoquery –duplicates
Note: First, run the sudo dnf upgrade command because this list only works if your system is fully updated. If you don’t, you’ll see a list of installed packages that are no longer in the repositories because an update is available. This list could also have packages installed from third-party repositories that haven’t been updated.
The most recent version of the software from official repositories should be installed. However, some packages on your system may no longer be available in the repository. To view a list of these packages, perform the following:
sudo dnf list extras
If you find a package that you do not require or use, you can uninstall it by:
sudo dnf remove $(sudo dnf repoquery --extras --exclude=kernel,kernel-*)
You can safely dispose of unused packages by using the following:
sudo dnf autoremove
6. Clean-up old symlinks
After an upgrade, there may be some broken symlinks in the filesystem. Installing the symlinks utility and deleting the existing links will eliminate the broken links. You can install the symlinks by executing the following line of code:
sudo dnf install symlinks
Once the program is installed, you can audit broken symlinks, as outlined below.
Note: -r indicates recursion.
sudo symlinks -r /usr | grep dangling
After verifying the list of broken symlinks, you can delete them as detailed in the following section.
Note: -d signifies delete.
sudo symlinks -r -d /usr
How to resolve post-upgrade issues
Follow these procedures only if you experience issues with your upgraded machine.
1. Reconstructing RPM database
If you encounter warnings while using RPM/DNF tools, your database may be corrupt. It is feasible to rebuild it to determine whether your issues are resolved. Always back up the /var/lib/rpm directory first. To regenerate the database, execute the following:
sudo rpm –rebuilddb
2. Label files using the most current SELinux policy
If you experience any SELinux policy-related errors, specific files may have erroneous SELinux permissions. This may occur if SELinux was previously disabled. To relabel SELinux on the machine, execute the command below and reboot:
sudo fixfiles -B onboot
The boot procedure will most likely take a long time because it will examine and repair SELinux permission labels on all files in your system.
3. Using distro-sync to address dependency problems
By default, the system upgrade tool uses dnf distro-sync. If your system is partially upgraded or you observe package dependency difficulties, manually run another distro-sync to determine if this resolves the issue. This will attempt to make your installed packages match the versions in your currently enabled repositories, even if some packages must be downgraded:
sudo dnf distro-sync
Additionally, you can use the –allowerasing option to delete packages with unsatisfiable dependencies. Always examine which packages will be eliminated before confirming this:
sudo dnf distro-sync –allowerasing
That’s it. Enjoy using Fedora
Conclusive Remarks
This lengthy article has covered all the aspects one needs to know about updating the Fedora installation. This guide has illustrated all methods (GUI and command-line ways). Besides, we have touched on the post-upgrade process that can help you get along quickly with your Fedora installation after a successful update. Keeping Fedora updated is a simple process. Depending on your comfort level, choose the method that meets your requirement. I hope you found this guide helpful. If yes, please let us know which way worked best for you in the comments below.


