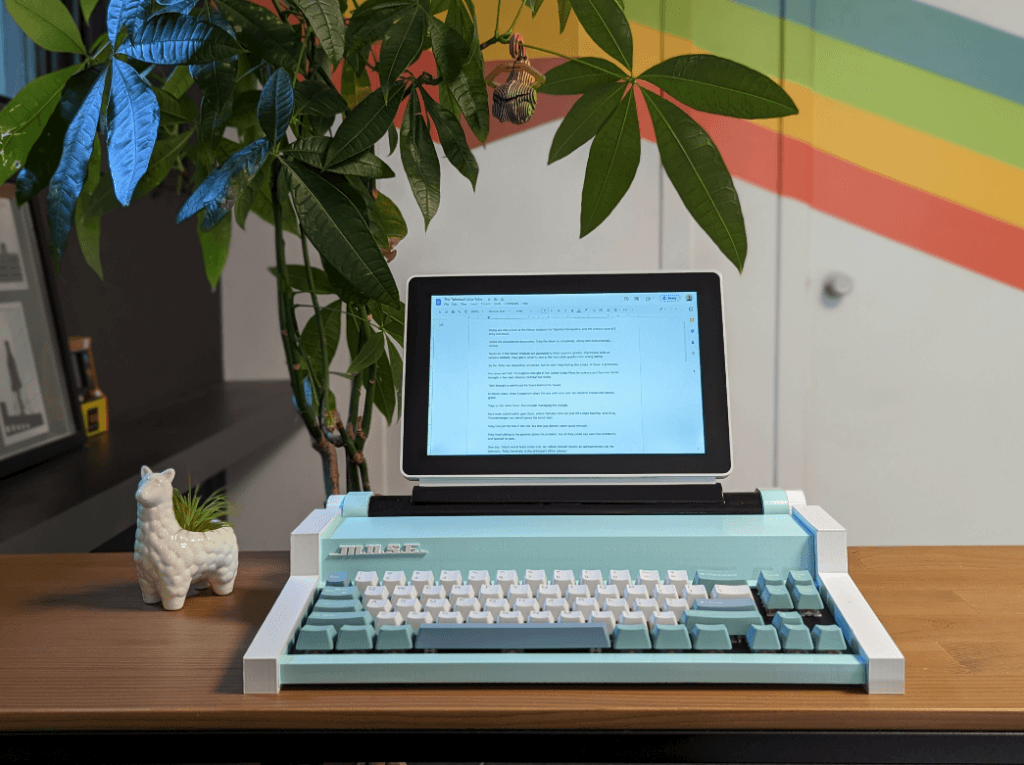
The Most Unusual Sentence Extractor, or M.U.S.E. for short, is just about the prettiest thing featured in the latest issue of HackSpace magazine. Its creator, Brendan Charles tells us why he built this Raspberry Pi-powered typewriter.
Storytelling has always been a huge part of my life; from my dad telling me elaborate bedtime stories to playing D&D with my uncle growing up. After I became a father, it was my turn to tell my kids stories. Eventually, my compendium of tales grew so large that my wife challenged me to start writing them all down. Once I did, I found I couldn’t stop writing. However, as my kids grew up and the realities of parenting sunk in, I found I had little time to write anymore. What made things worse is I developed a competing hobby: tinkering with computers and 3D printing. One day, I realised it had been over a year and a half since I had written anything of substance and decided something needed to change. So in typical procrastinator fashion, instead of just forcing myself to sit down and write something, I decided to make myself a computer dedicated to writing; something that would inspire me to write and help me focus on the task of putting words on the screen.
I wanted my computer to be a traditional word processor but with a few modern updates: it was important for me to be able to write directly to the cloud so that I could pick up writing from anywhere, and know my progress would be saved automatically. I also wanted a screen to display my documents in a very simplified manner – ideally monochrome or e-ink so that my focus was on the words directly and not on social media, video games, or any other distractions. With this in mind, I started my preliminary design process.
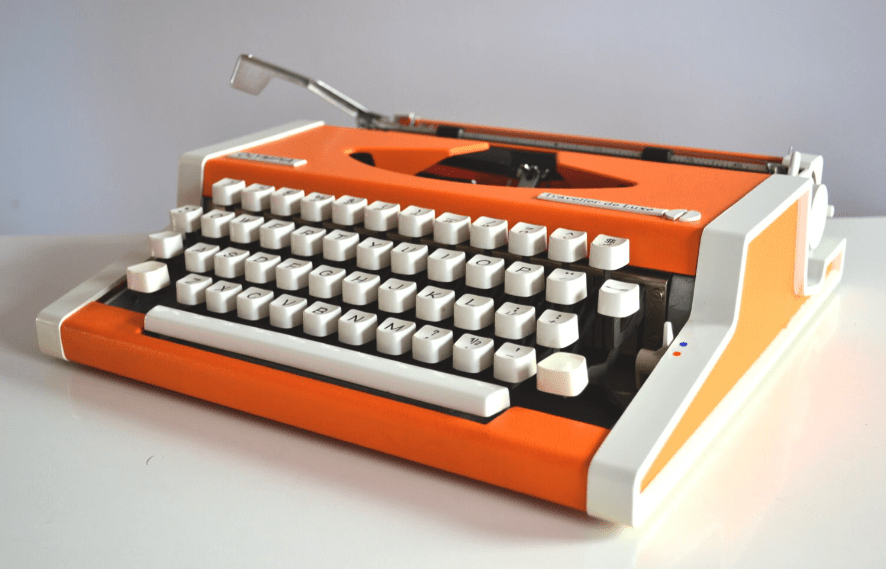
My main source of inspiration came from the typewriter, a machine built for the sole purpose of writing. I owned a classic Remington Travel-Riter Deluxe, but I wanted something a little more flashy, so I looked to the 1960s and 1970s for a more colourful design. I found exactly what I was looking for in the Olympia Traveller de Luxe. The vibrant colours and simple design were just what I wanted. Also, the form factor was perfect for a 3D-printed case that could fit all the components in the centre. With a few reference images at the ready, I moved on to the main design phase.
One of the most important considerations for this project was the custom-made keyboard, since the entire size of the case would be dependent on its dimensions. So the first thing I did was research open- source mechanical keyboard projects and decide which was best for me. I ended up choosing the 68Keys.io board because I really liked the form factor. While I didn’t need a numpad, I still wanted arrow keys for navigation and dedicated buttons for Page Up/Down and Home/End buttons, since those are important for word processing. Thankfully the keyboard I chose had all of those elements and nothing extra. Once that was settled, I was able to begin designing in earnest.
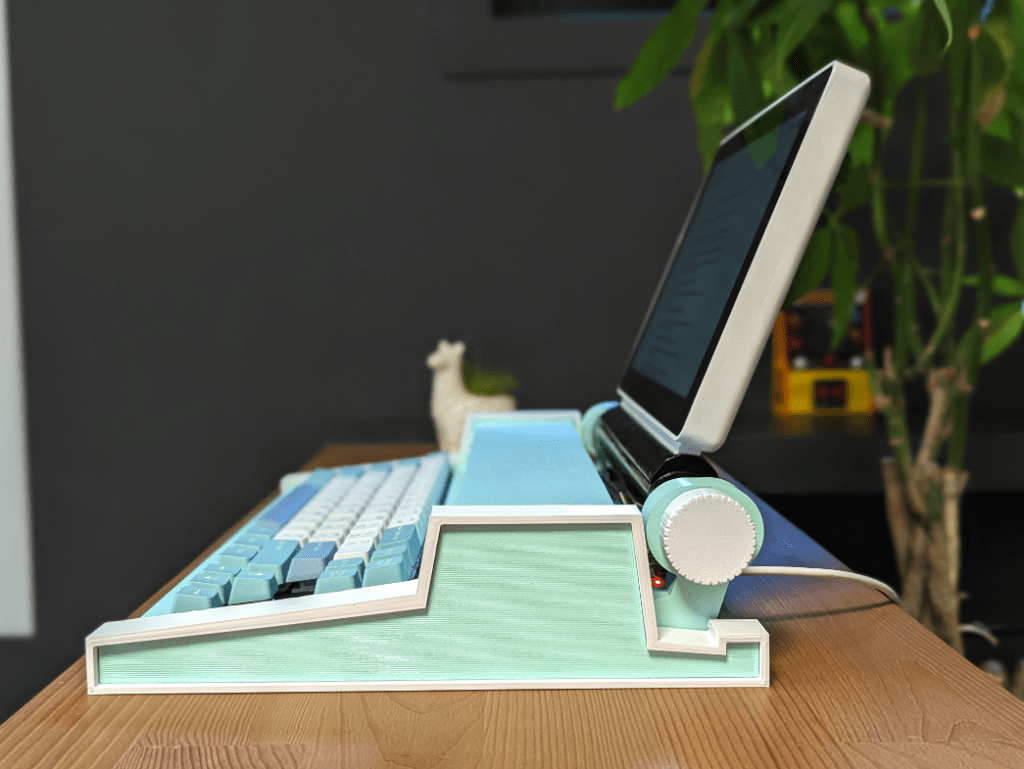
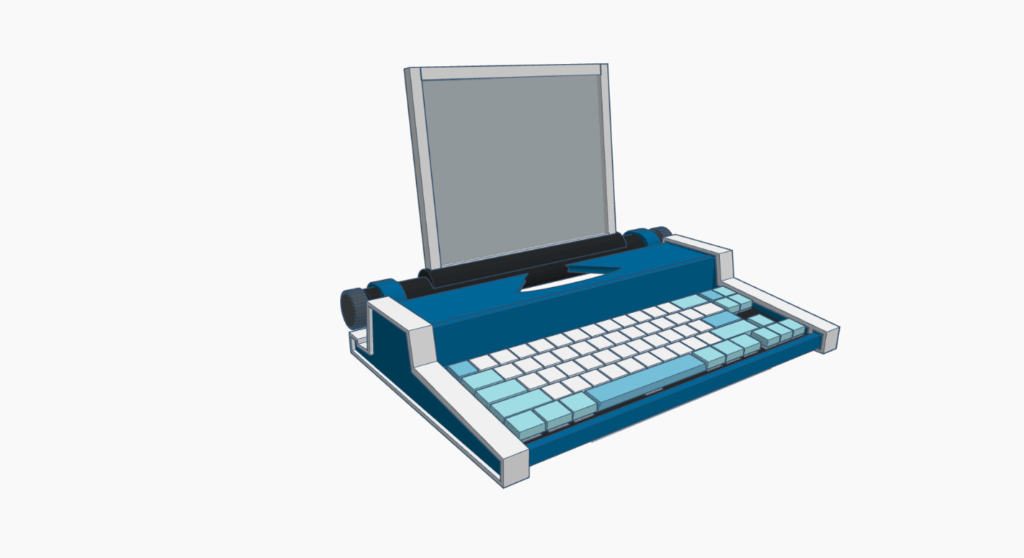
I like to work in Tinkercad for its simple interface and easy workflow to 3D printing. It’s also browser-based, so it lets me work from anywhere without reinstalling software or managing licences. I started by creating the side profile of the case, giving it the shape I desired while leaving enough room for a Raspberry Pi, wires, and probably a display control board. Then I mocked up my 68Keys keyboard and made sure it fit into the case in a convenient way for assembly. One thing I struggled with was integrating visual motifs from the typewriter, but not adding unnecessary ornamentation for no reason. The carriage return mechanisms on a traditional typewriter, for example, did not make sense here, so I decided to make the platen (the rubber roller) double as the screen holder and get rid of the rest. I kept the small handles on the sides as a little ornamental touch, but no more than that.
The screen was one of the primary considerations for my project and one I wasn’t completely confident with from the beginning. I decided to try an e-ink display because I liked the idea of the paper-like visuals that would reference the old medium of ink on paper. I found a 10-inch screen made by Waveshare that I thought would work and integrated it into my 3D design, based on specifications I found online.
Now that I had the 3D design finished, it was time to print the case. This proved to be a difficult step in the process since the case would be slightly larger than my printer bed. In the end, I printed my case vertically, which fit. However, after a couple of attempts, I realised I needed to integrate extra supports to prevent the whole model from wobbling and affecting the print quality. A few kilograms of filament later, I had the main body of my case printed and started printing the display holder, and all the other pieces I was going to need. All the troubles I had with 3D printing actually taught me a lot for my future builds and the medium in general. I have used similar supports to solidify my builds, and my overall quality of printing has improved a lot lately.
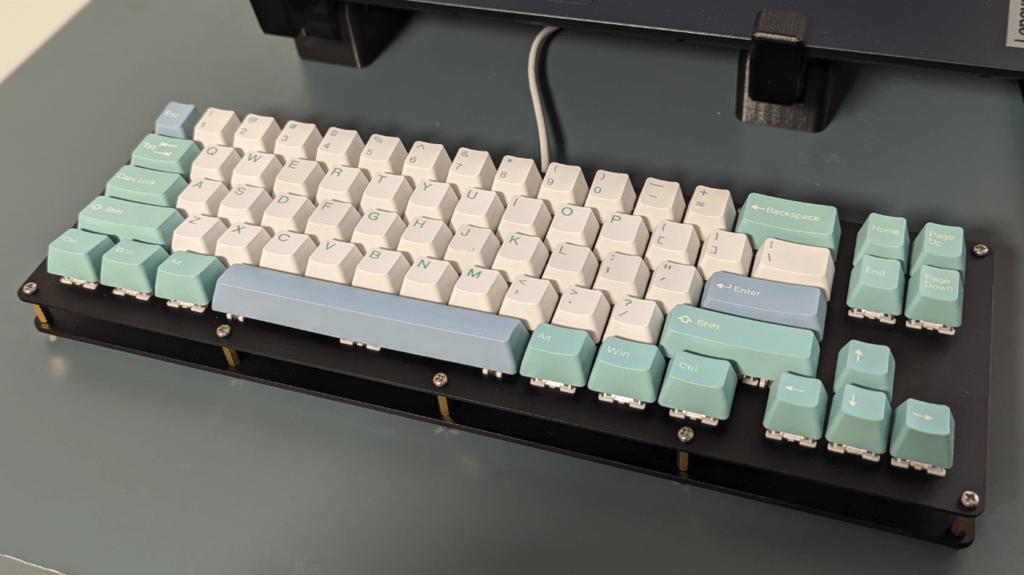
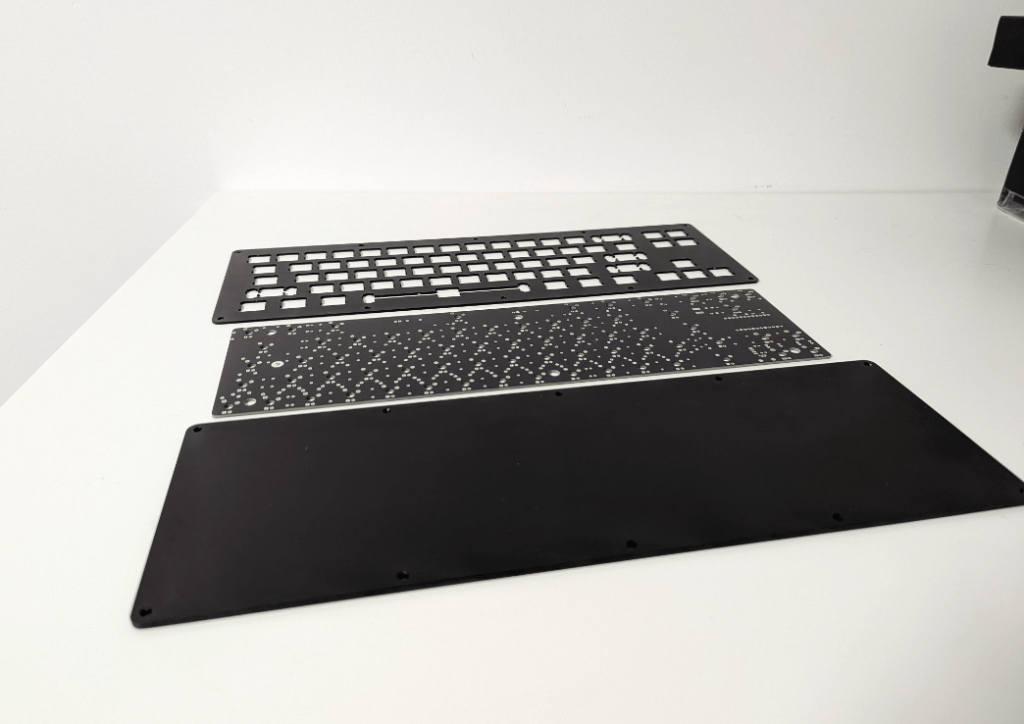
For the keyboard, I sent the relevant files to PCBWay to create the PCB, as well as an anodized metal plate to serve as a frame for the keys. The instructions provided by the 68Keys.io team were all straightforward, and when I received my parts, I set to work making the keyboard. This involved soldering the diodes, microcontroller, and switches to the PCB, and configuring the firmware and flashing it to the microcontroller. I found a perfect seafoam and teal keycap set to match the colour I had imagined for my case. For the switches, I ended up choosing a Gateron silent switch because while I wanted a traditional typewriting experience, if I was going to be typing for hours at a time on this machine, I didn’t want the typing sound to become annoying or overbearing in any way. In the end, I was happy with my decision. When I constructed the keyboard, there was still a satisfying clacking sound of the keyboard, but not so much that it was distracting.
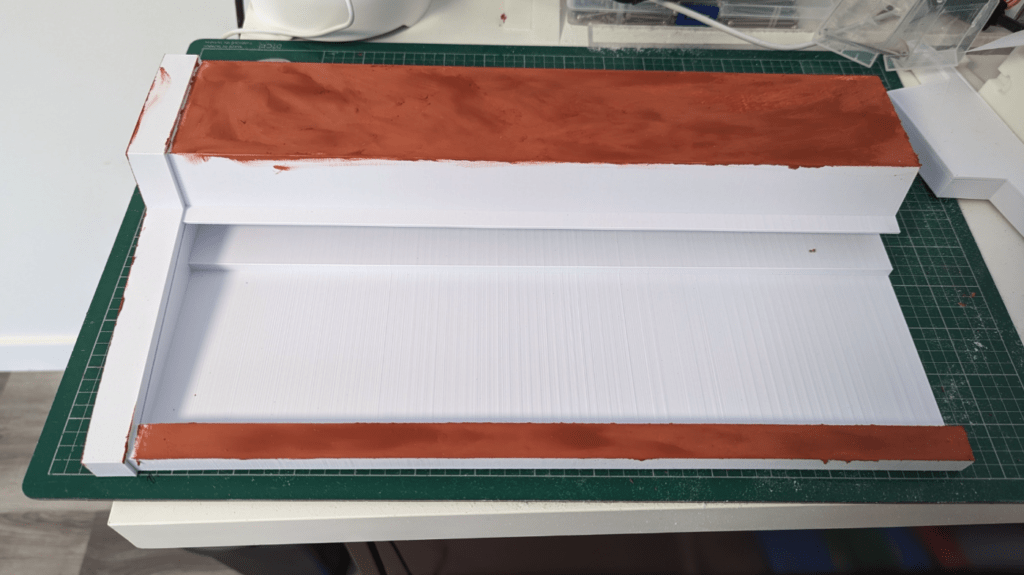
With the keyboard constructed, I had perhaps the biggest portion of my project ahead of me: the finishing work on my plastic case. The first step of this was filling the gaps, lines, and faults in the plastic with 3M Bondo automotive putty. This product dries hard and can be sanded smooth, so it’s perfect for fixing imperfections in the plastic. The next step was to spray-paint the case in baby blue and white, where needed. Several sanding passes and coats later, the case was looking smooth. Overall, I was really happy with the look of the case. It reminded me of the 1960s and 1970s typewriters that inspired me so much, while still having its own unique look.
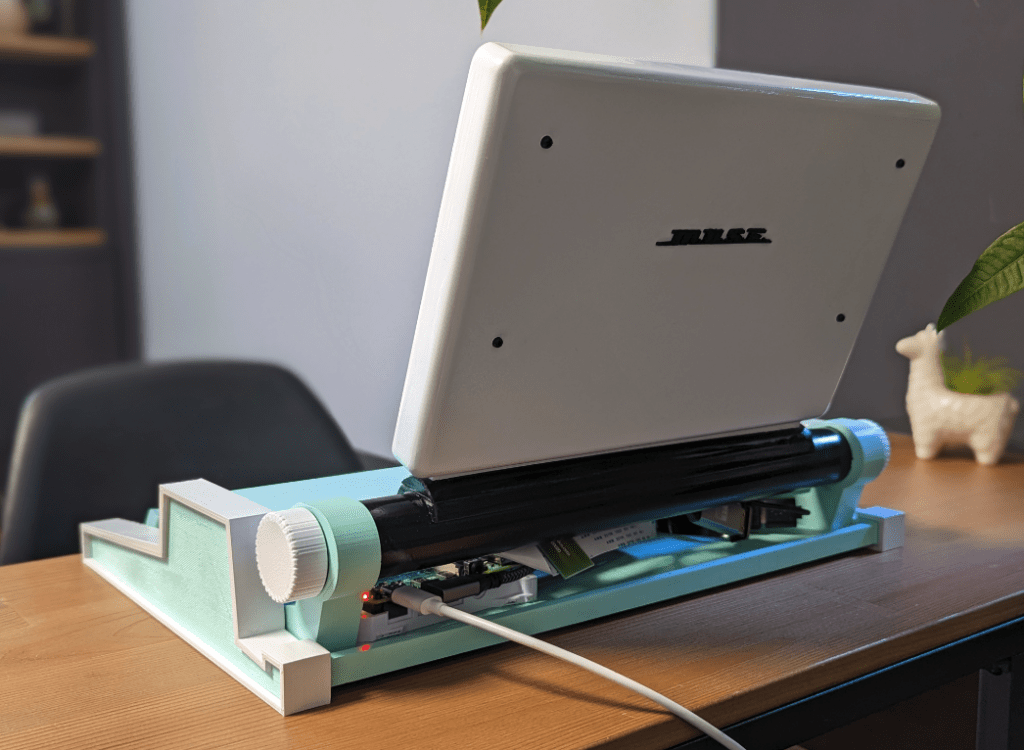
Now that I had the bulk of my components, it was time to begin putting everything together. I had placed a slit in the case that the keyboard frame would slide into, and then the right side of the case slipped on and held everything together. I made everything tight enough so that it held together through tension alone, because I wanted to be able to take it apart again should it need repairs or if I wanted to tinker further. For the platen, I found a black PVC tube and installed my 3D-printed screen holder and bracket to it in order to hold the display.
Just as I was starting to finalise my project, tragedy struck. The e-ink display I had been using had a problem and seemed to be no longer working. I tried troubleshooting and even contacting the manufacturer, but, whatever we did, we couldn’t revive it. I was extremely discouraged, especially since I was so close to the finish line. However, after all this work, I wasn’t about to let one setback stop me. So I went back to the drawing board. Actually, I went back to Amazon, to be precise, and started looking at other displays. It was a good thing I did, because I ended up finding something that had the potential to work better for my project than the e-ink display to begin with.
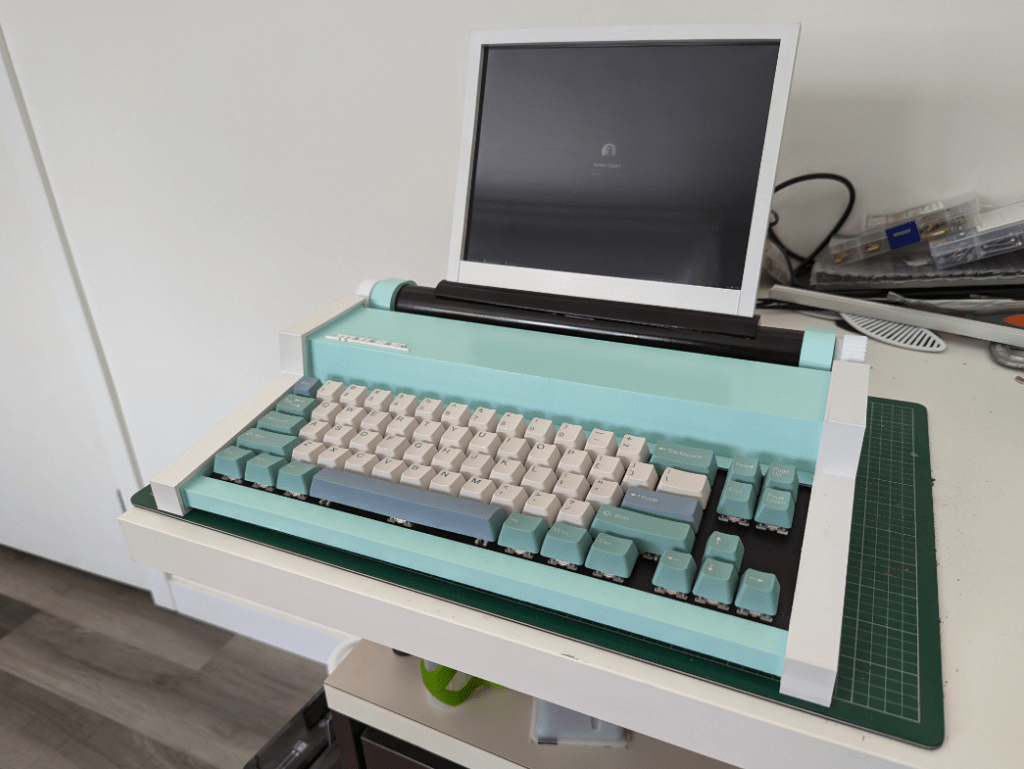
While e-ink is a fascinating technology that I really wanted to experiment with, for word processing, it had a slight drawback: with no backlight, I would only be able to type during the day or in a fully lit room. So I decided to go with an LCD touchscreen by SunFounder that was roughly the same size as my e-ink display, albeit quite a bit thicker. The added bonus to this display was it had capacitive touch, which meant I could forgo the keyboard-only navigation I had planned on and use the screen almost like a tablet. Once I designed and printed a new screen holder and assembled it with the rest of the parts, I was amazed at the intuitiveness of the new screen. I could just reach up and highlight text or navigate the OS with ease – it brought the entire project together.
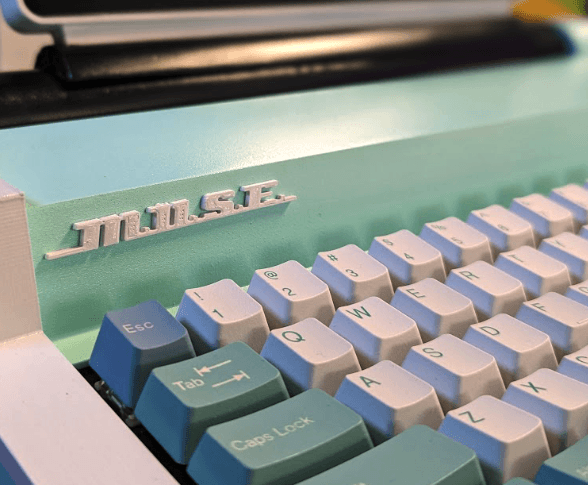
With my typewriter more or less completed, it was time to give it a name and add the finishing touches. I had chosen the font before the name since I wanted a connected font like on my Remington typewriter. When I was experimenting, I noticed I liked the look of the logos a lot more when using all caps, so I decided to go with an acronym. After a lot of searching and playing around with words, I landed on the Most Unusual Sentence Extractor, or M.U.S.E. for short. Its acronym also worked as a word since I had designed this computer to inspire me to write, in other words: to be my muse. With that decision made, I 3D-printed some logos for the front and back using the Remington-style font and then secured them to my case. I was really happy with my fully realised typing assistant. It had all the style and functionality I wanted. In the end, the setbacks I had only served to make the final result better.
So does it work? Am I writing more? I can confirm that it does. I am. Believe it or not, I’m writing this article on the M.U.S.E right now. I find typing on it extremely satisfying, and while I can’t say for certain that my words per minute have skyrocketed, I definitely feel more productive. I also enjoy the ritual of writing on something other than my normal personal computer. I make a point of switching workstations and declaring, “It’s writing time”, and that’s just a really good feeling. Now I just hope I can write something worthy enough of my invention.
HackSpace magazine issue 70 out NOW!
Each month, HackSpace magazine brings you the best projects, tips, tricks and tutorials from the makersphere. You can get HackSpace from the Raspberry Pi Press online store or your local newsagents.